Filtering a DataGrid
In this guide we’re going to cover the best way to filter data, this will demonstrate how to limit the results in your DataGrid view from the last tutorial - showing how to refine results.
To get started add a Textbox control and button to the form which contains the DataGrid. You can see an example of this below.
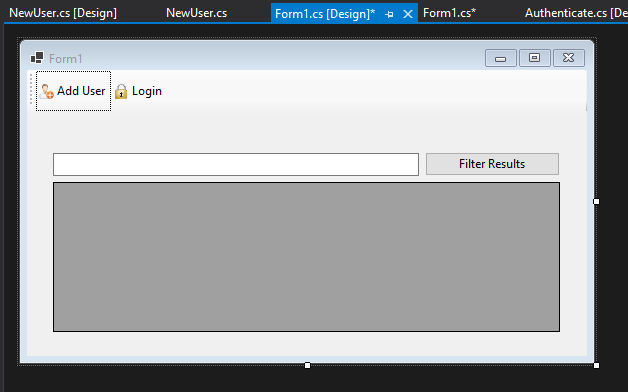
I have called these controls txtFilter which is the textbox control and btnApplyFilter which is the name of the button. You should be getting well versed with the naming of controls by this point in the series.
Once you have added the controls we need to add some code which is triggered when the Filter Results button that we just added is clicked. The best way to do this is to double click the Filter Results button which will build us a code block within the current form. In this case I’m working within the Form1.cs [Design] file.
private void btnFilter_Click(object sender, EventArgs e)
{
    // we will add any code which we want to trigger when clicking the button here
}
A blank sample of the code block can be seen above. I have commented where we will be adding the rest of the code to process the filter request. Bear in mind that the next few code steps are code concepts that you have seen before.
The first thing we need to do is give access to the DataContext so that we can deal with data within the database, the method we have been using for this is to create an instance of the DataContext, or an object called context. Feel free to call this what you like, instead of context if you feel that another name would be more useful.
// create an instance of the DataContext
var context = new DataContext();
Once you have added this we need to check that we have an active database connection, again this is code you have seen before.
 // if the connection to the database is successful
if (context.Database.CanConnect())
{

    // if the database connection is successful run this code

}
All of our database connection code is now in place so the next step is to allow our new controls (textbox and button) to influence the results which are displayed in the data table. For this we will adjust our LINQ query so that it accepts parameters from the textbox - the query in LINQ syntax could therefore look something like below.
// query for results which match the entry in the textbox called
// txtFilter
var query = from usr in context.Login
            where usr.Username == txtFilter.Text
            select usr;
At the moment we’re just storing this query in a variable called query, again feel free to rename this to something more useful. Good practice would require us to name this something useful, for example consider a naming convention such as qryFilterUsername to replace our existing name.
This query creates an alias for the Login table, in this case this alias is usr. All this does is provide a short name for us to use later in our query. You can see the alias name is used a further 2 times in this query. In this case of this query I have indicated that I want to return all results where the username equals exactly what I have typed in the textbox called txtFilter by using the Text property.
You should consider validating this data - that is something additional for you to look at, also consider the datatype being accepted. Is this application now susceptible to an SQL injection attack for example?
Following the implementation of the LINQ query itself we need to put this into action. The next step is to issue the query and gather the result from SQLite. Again you have seen similar code previously throughout this series.
var result = query.Take(100);
var listResults = result.ToList();
In these two lines we have created a new variable called result which will store the results of the query which is called query, bad naming I know, but again something for you to consider. We then convert this to a List, which is what our DataGrid control will accept. The final step in this whole process is to tell the DataGrid to display these new results. To do this we use the following line of code.
// set the datasource of the control
dgLogins.DataSource = listResults;
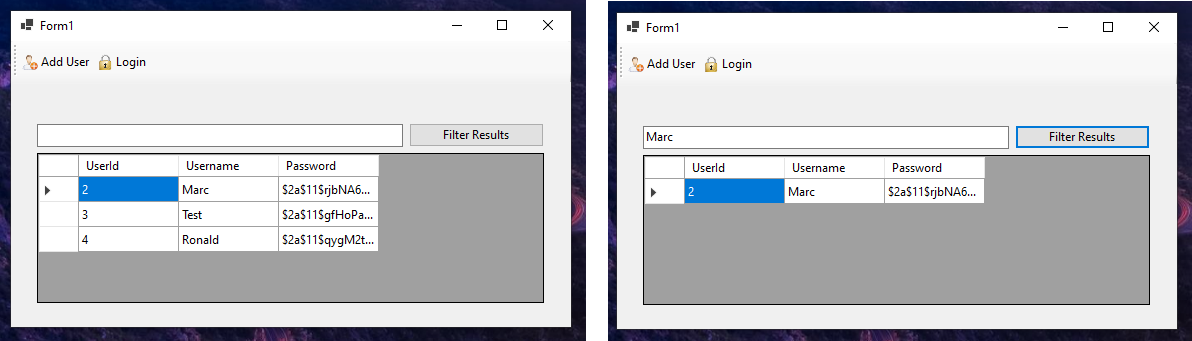
Running the application and typing in a search value and clicking Filter Results will now provide a filtered data set - you can see a sample of this below. The left image showing the unfiltered data set, the right showing the filtered dataset.
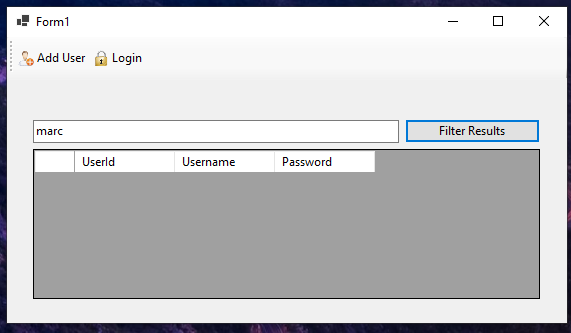
At the moment the filter requires an exact match, this isn’t always useful. For example searching for ‘marc’ yields no results (see example screenshot below), even though we know that a user called Marc (capital M) exists in the database. Would your user think that there is a difference? See if you can make this more user friendly.
Full Code Listing
Overall your code for the btnFilter_Click code block should look like below. Please do not just copy and paste this code, reading through the article will give you a greater understanding why this code is being implemented and the next steps for you.
 private void btnFilter_Click(object sender, EventArgs e)
 {
        // create an instance of the Data
        var context = new DataContext();

        // if the connection to the database is successful
        if (context.Database.CanConnect())
        {

            // query for results which match the entry in the textbox called
            // txtFilter
            var query = from usr in context.Login
                        where usr.Username == txtFilter.Text
                        select usr;

            var result = query.Take(100);
            var listResults = result.ToList();

            // set the datasource of the control
            dgLogins.DataSource = listResults;

        }
    }