Data Connections
As you open Visual Studio 2019 to create a Windows Forms App you will see a screen which looks like the following. This is a Windows Form, and gives us a drag and drop editor to create our form or window design.
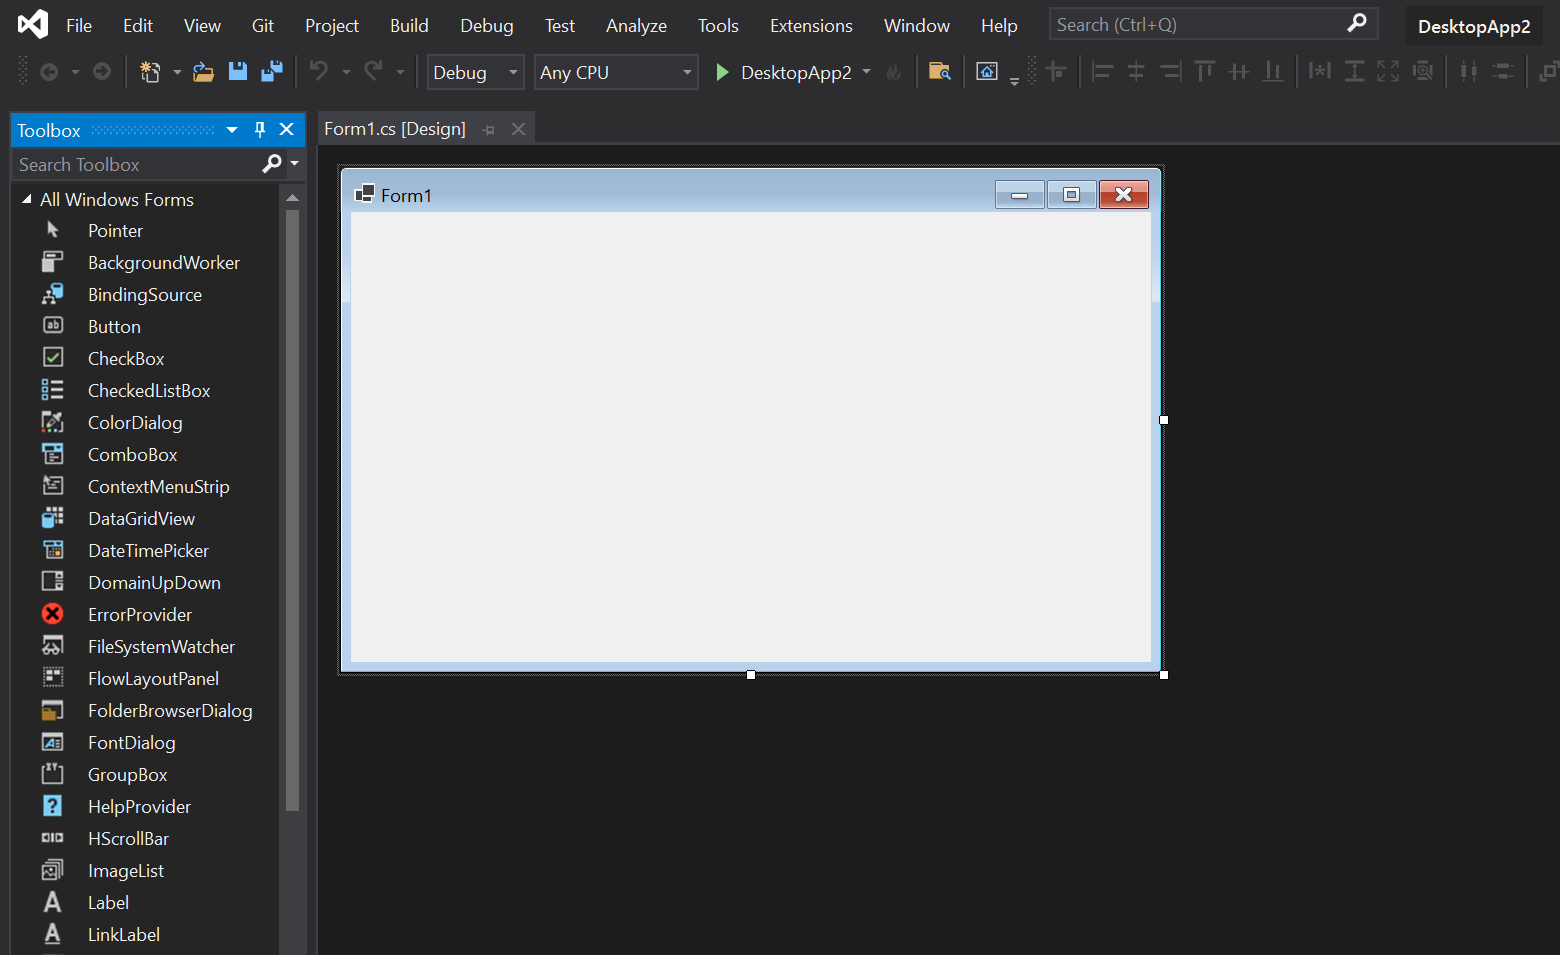
On the left hand side you will see the toolbox, if this isn’t visible you can enable it by selecting View and then Toolbox.
We’re going to configure this application to connect to an SQLite database, there are a couple of reasons for this but the main reason is portability. If you would like to read more about SQLite please read the following article which will allow you to gain an additional insight.
Adding the Database
As SQLite is an external system, not managed in any way by Microsoft we need to create and import our SQLite database, the creation process is outside the bounds of this guide, however if you would like to know how to do this please read this article (coming soon).
You should have a single database file created, and somewhere handy on your machine, the desktop is a good place for ease of access. One of the key benefits of an SQLite database is that it’s a single file. Your file will have the file extension .db, or .db3 usually.
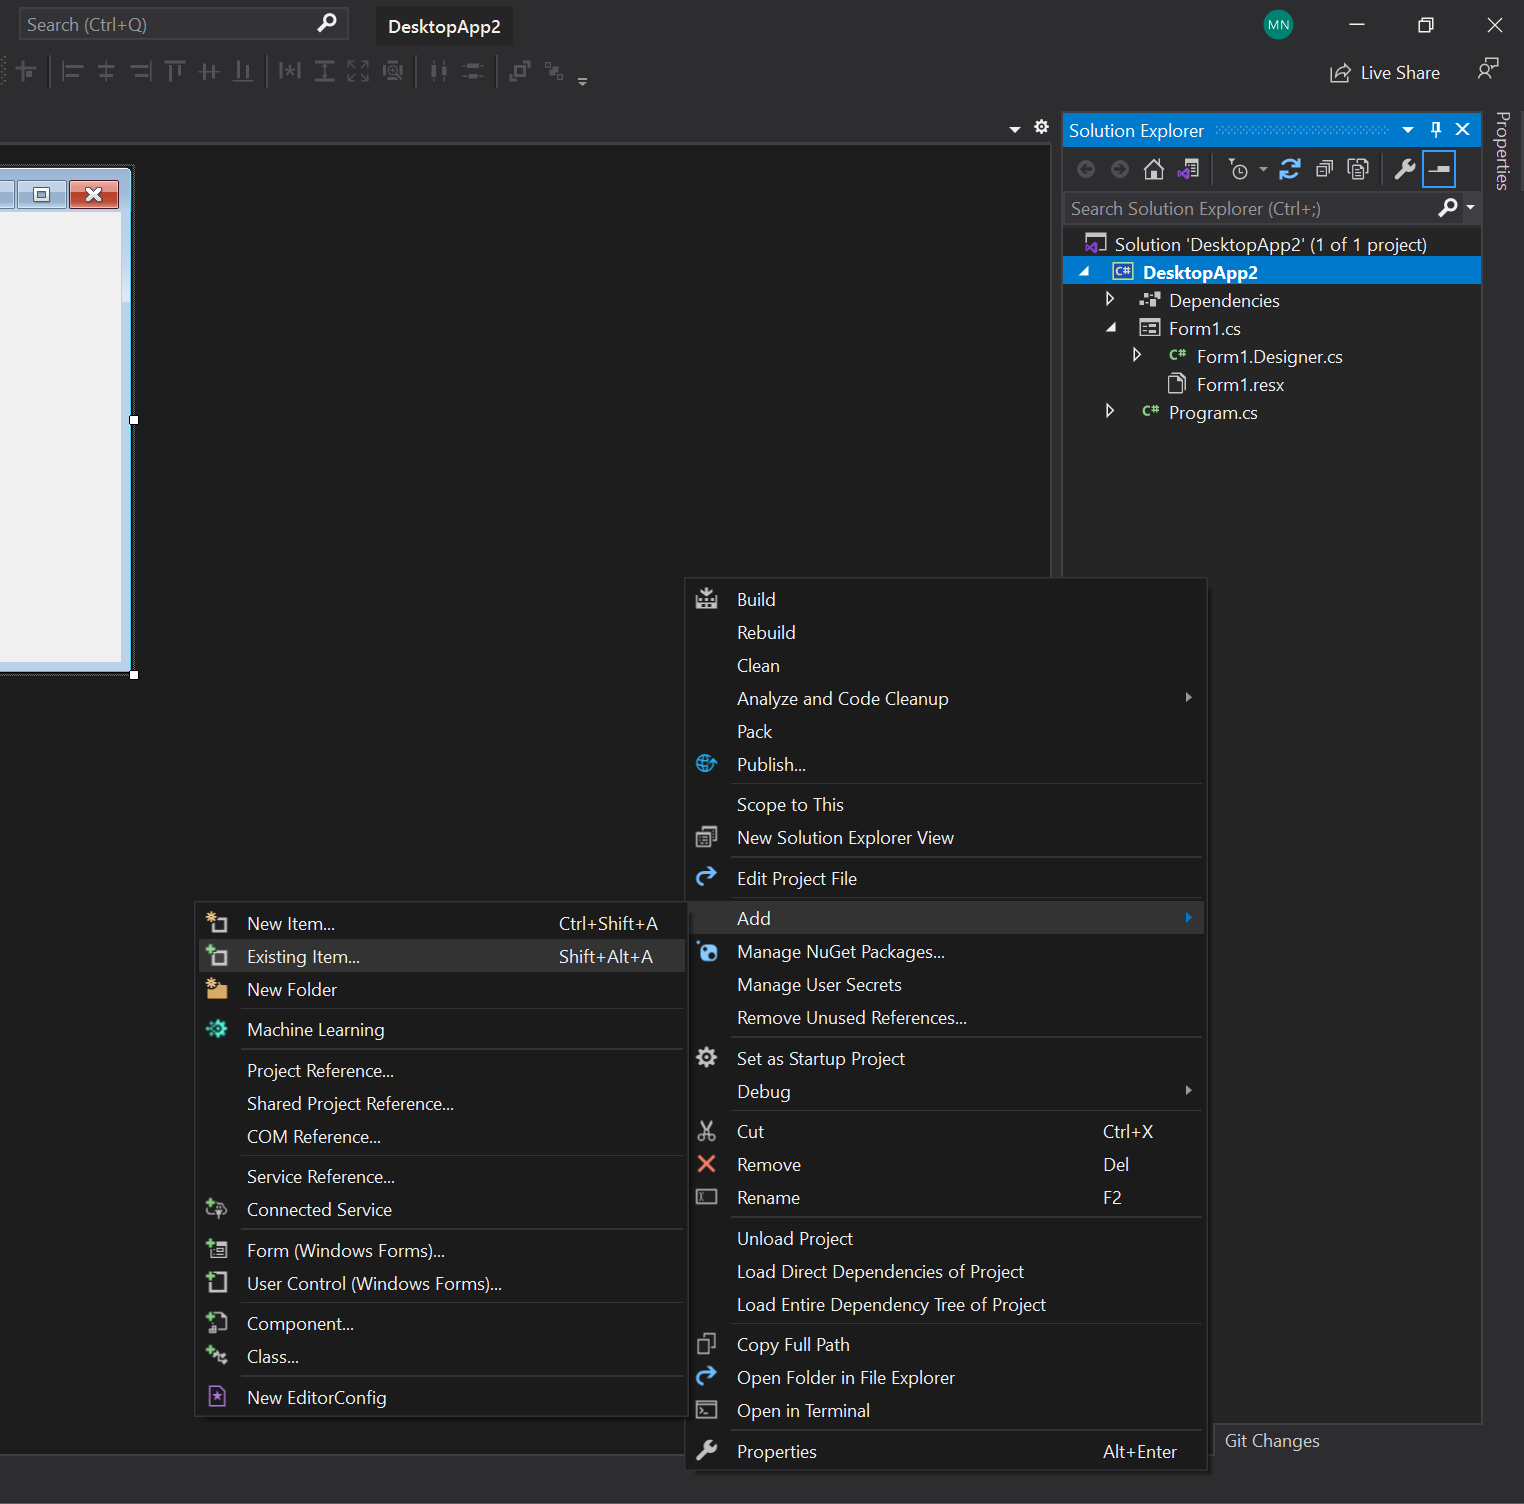
To do this right click in the solution explorer, select Add and then Existing Item.
This will open a browse dialog. From this dialog you need to change the file type dropdown to Display all files. This will enable to file browser to see our SQLite database file.
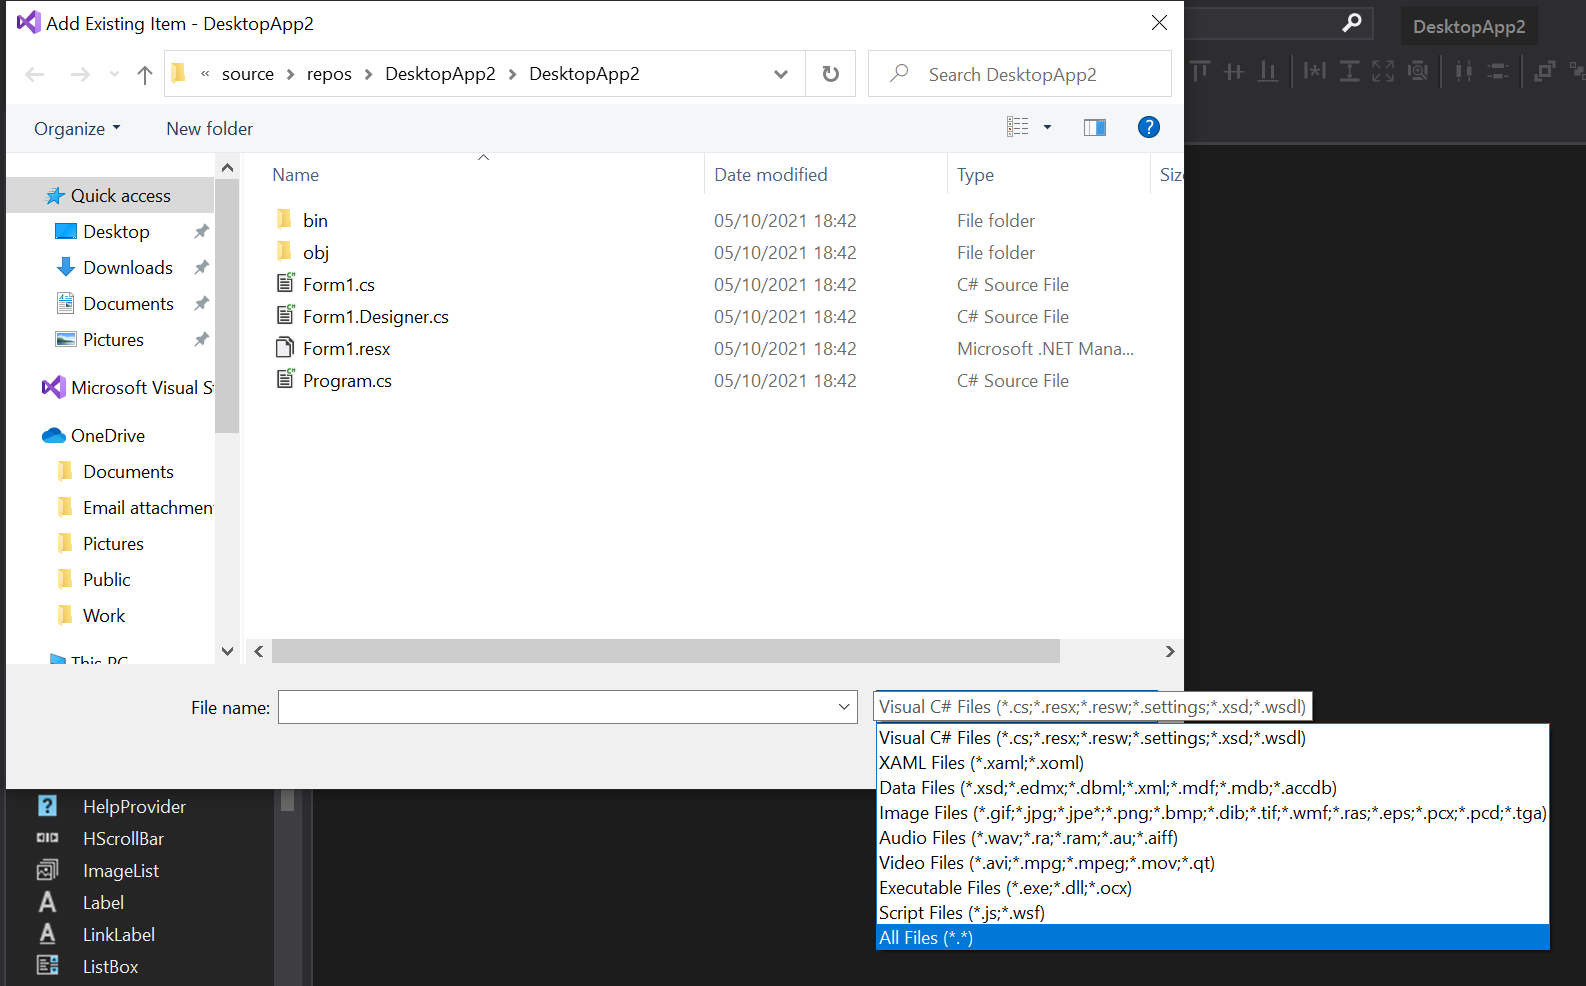
Move to your file location, where you should now be able to see your .db or .db3 file. Select this file and then click Add.

Once you have added your file it will display in the Solution Explorer on the right hand side of your screen. We now need apply some additional settings to this file so that we can access it later when we start to work with the data in the project.
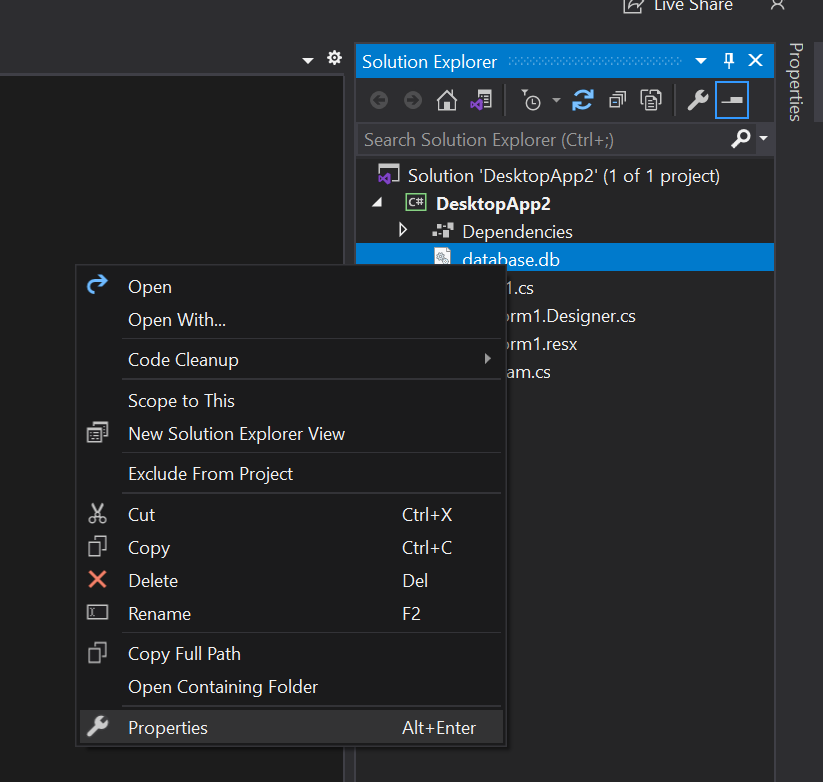
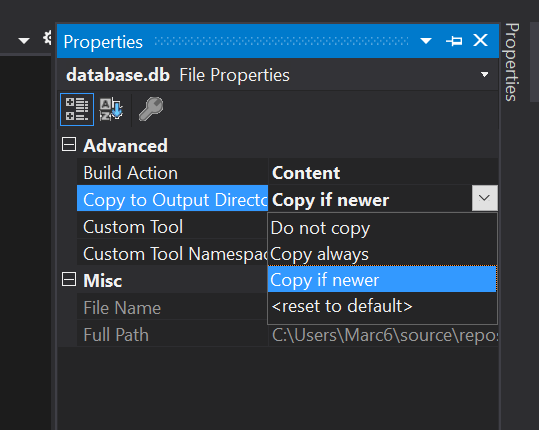
Right click this file and then select Properties which you can find right at the bottom of the context menu which is displayed. Change the settings in the Properties panel so that the Build Action is set as Content and the Copy to Output Directory is set as Copy if newer.
Our database is now in our project. Let’s move on and explore how we can get our application to connect to the database so that we can work with the data 🙂.
Connect to the Database
Now we have our database file imported into the project we need to get hold of some important information which will help us along later in this guide, that is the build location of the database. As Visual Studio compiles the code, so that you can preview the application it will now create a copy of the database (if changes have been made) within the output directory for the project. To get the file location of this directory follow the steps below.
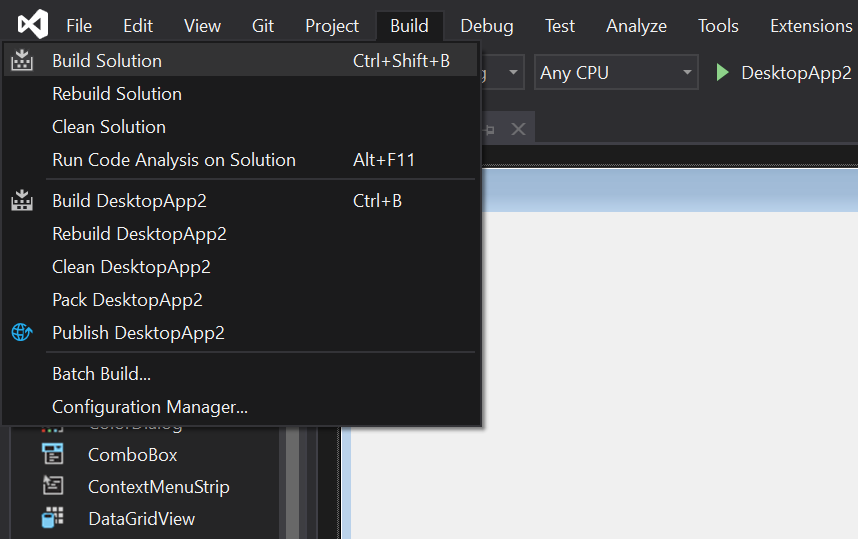
First of all click on Build on the top menu and then select Build Solution. This will create a copy of your current database into a file location accessible by your application, very important if we want to be able to access the data within our application.
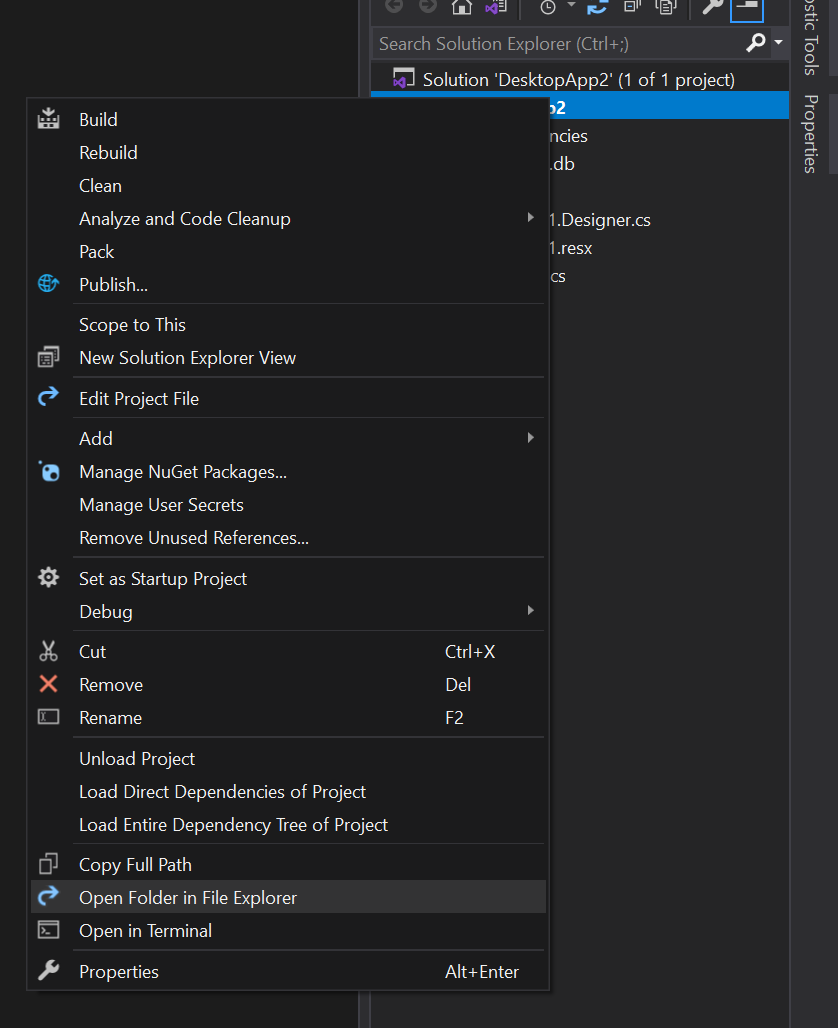
Once you have done this right click on your project name in the Solution Explorer and then select Open Folder in File Explorer.
This will open up Windows Explorer on your desktop machine in the background. This is what is known as your solution directory, and contains all of the necessary files used to build and deploy your application. In here navigate into the following directory bin/debug/net5.0-windows here you should now see a copy of the database file you imported into your project. In the example case this is called database.db.
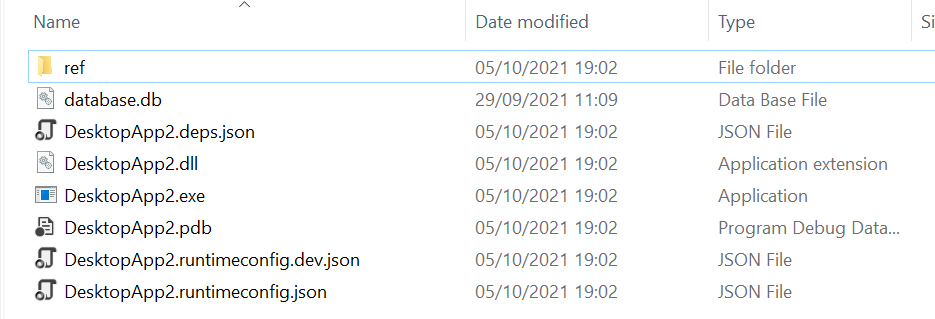
Make a note of the file location, in my example this is C:\Users\Marc6\source\repos\DesktopApp2\DesktopApp2\bin\Debug\net5.0-windows\database.db we will use this file location again shortly. We now have our database file imported and a note made of the location of the database file we will use in our application.
The next thing we need to do is to allow Visual Studio and specifically .NET Core 5.0 to connect to our database file, for this we need to add some NuGet packages to our software.
Adding SQLite NuGet Packages
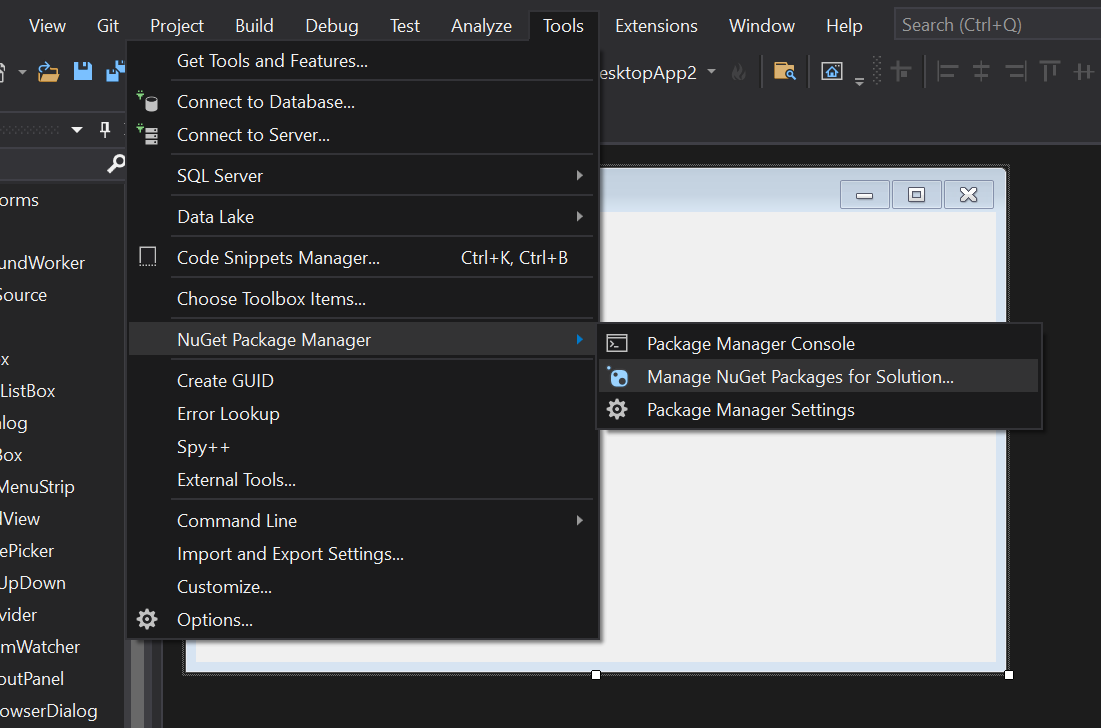
To add a NuGet package to your application click on Tools and then click on NuGet Package Manager and finally select Manage NuGet Packages for Solution…
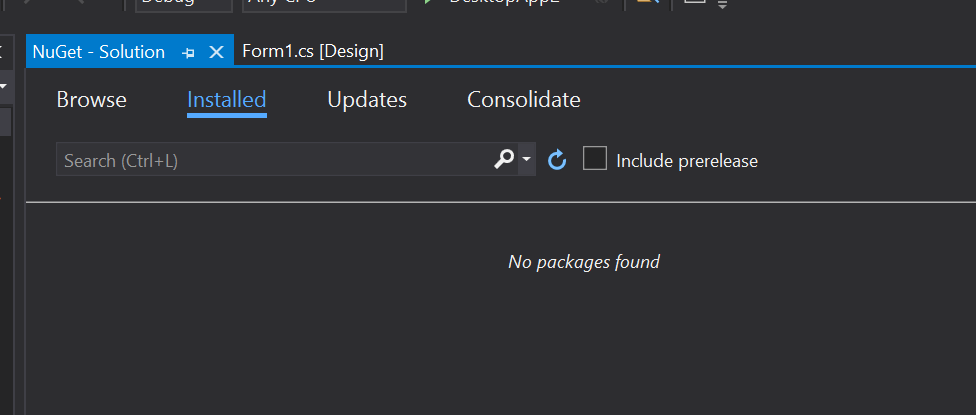
This will open the NuGet package manager. You shouldn’t see anything installed at the moment in this package manager window. In this case we need to use the package manager to add the ability for our application to connect to SQLite.
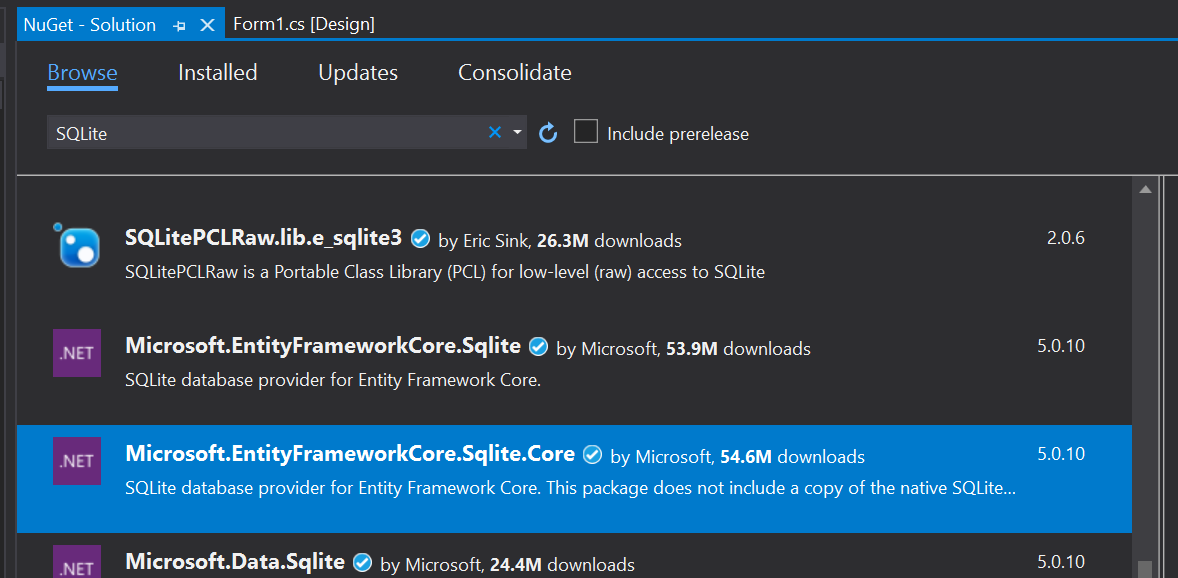
Click Browse at the top of this panel and then in the search box type in SQLite, this should search the internet for the latest relevant packages for SQLite. Once this search has completed find the package labelled Microsoft.Data.Sqlite.Core.
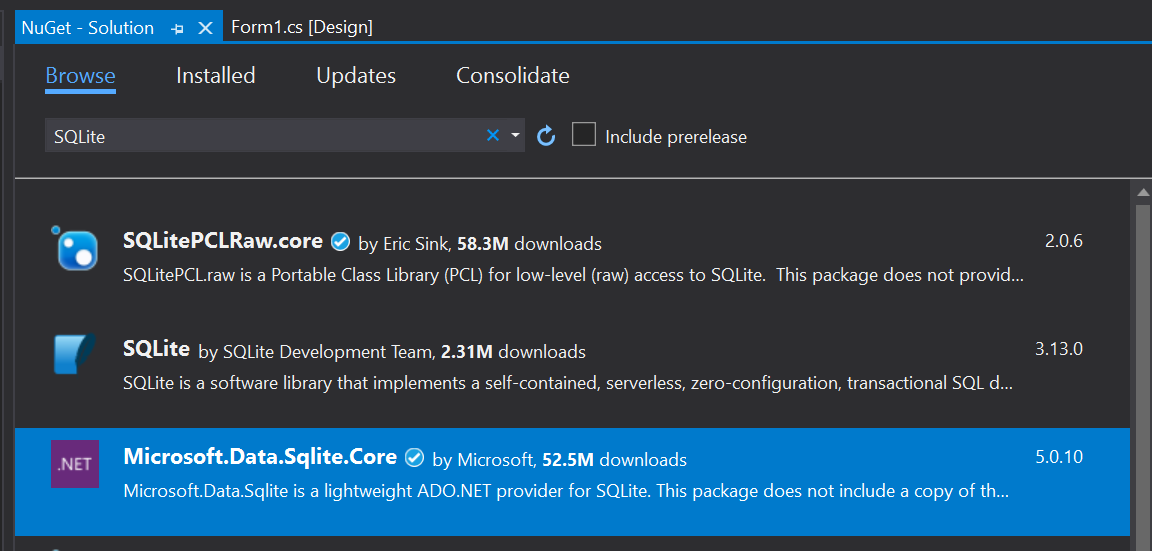
Highlight this by clicking it once until you see a blue highlight. On the right hand side of this panel you will see your project name along with the header ‘Project’. Check the checkbox in the header column, and then select Install.
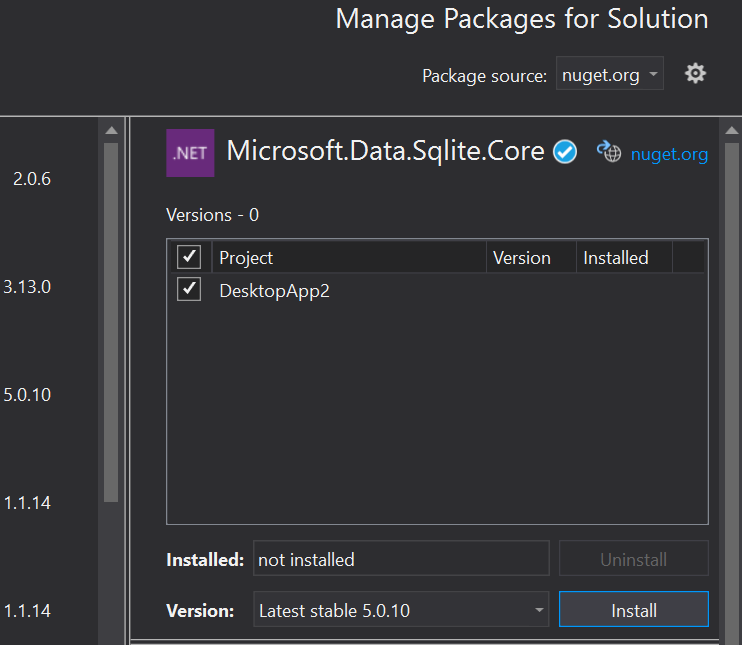
Using the steps above now search for the packaged called Microsoft.EntityFrameworkCore.Sqlite.Core and install this into your project also.
Once you have added both packages to your project you are ready to move onto the next stage.
Creating a Database Context
The next step for us is to allow our code to communicate with the database, to do this we create what is called a Database Context. This simplifies, and abstracts the connection layer between the application and the database engine in this case SQLite and will make things easier when we move forwards in terms of collecting data from our database.
To do this right click in the solution explorer on top of the Project Name, once again select Add and then New Item, in the selections available select Class and name the file DataContext.cs and then click Add.

Replace all of the code in this file with the following file snippet. Your Tutor will explain what this is doing during your lesson.
using Microsoft.EntityFrameworkCore;
using System;
using System.Configuration;
using DesktopApp2.Data;

namespace DesktopApp2
{
    public class DataContext : DbContext
    {

        public DbSet<Example> Example { get; set; }

        public string DbPath { get; private set; }

        public DataContext()
        {
            var folder = Environment.SpecialFolder.LocalApplicationData;
            var path = Environment.GetFolderPath(folder);
            DbPath = $"{path}{System.IO.Path.DirectorySeparatorChar}database.db";
        }

        // The following configures EF to create a Sqlite database file in the
        // special "local" folder for your platform.
        protected override void OnConfiguring(DbContextOptionsBuilder options)
        {
            options.UseSqlite(ConfigurationManager.ConnectionStrings["Default"].ConnectionString);
        }

    }

}
Make sure the namespace line matches your project name. In this case my project is actually called DesktopApp2, but if you created your app as ManagementApp then your first few lines of code would look like this…
using Microsoft.EntityFrameworkCore;
using System;
using System.Configuration;

namespace ManagementApp
{
    public class DataContext : DbContext
    {
Where the code sample shows the words database.db you should replace this with the name of your SQLite database file. For example if your database is called management.db then this line should read.
DbPath = $"{path}{System.IO.Path.DirectorySeparatorChar}management.db";
Another important part of the file to take note of is the line below…
public DbSet<Example> Example { get; set; }
This line allows us to link the database file with the Example table in the SQLite database. If we don’t have a table called example, but we have a table called Users this could just as equally be replaced with the following…
public DbSet<Users> Users { get; set; }
A line like this should exist for each and every table in your database that you want to work with within your Windows Forms application. Our database is almost ready to communicate with, the next step is for us to create a Model for each table in the database. Follow the next section for guidance on how to achieve this.
Creating a Database Model
A database model is exactly that, it’s a code representation of what your database tables look like and there should be one for each table in your database. Well, at least one for every table we want to work with.
To get started and create a new model create a new folder called Data in your solution explorer. To do this right click on your project name and then select Add and then New Folder.
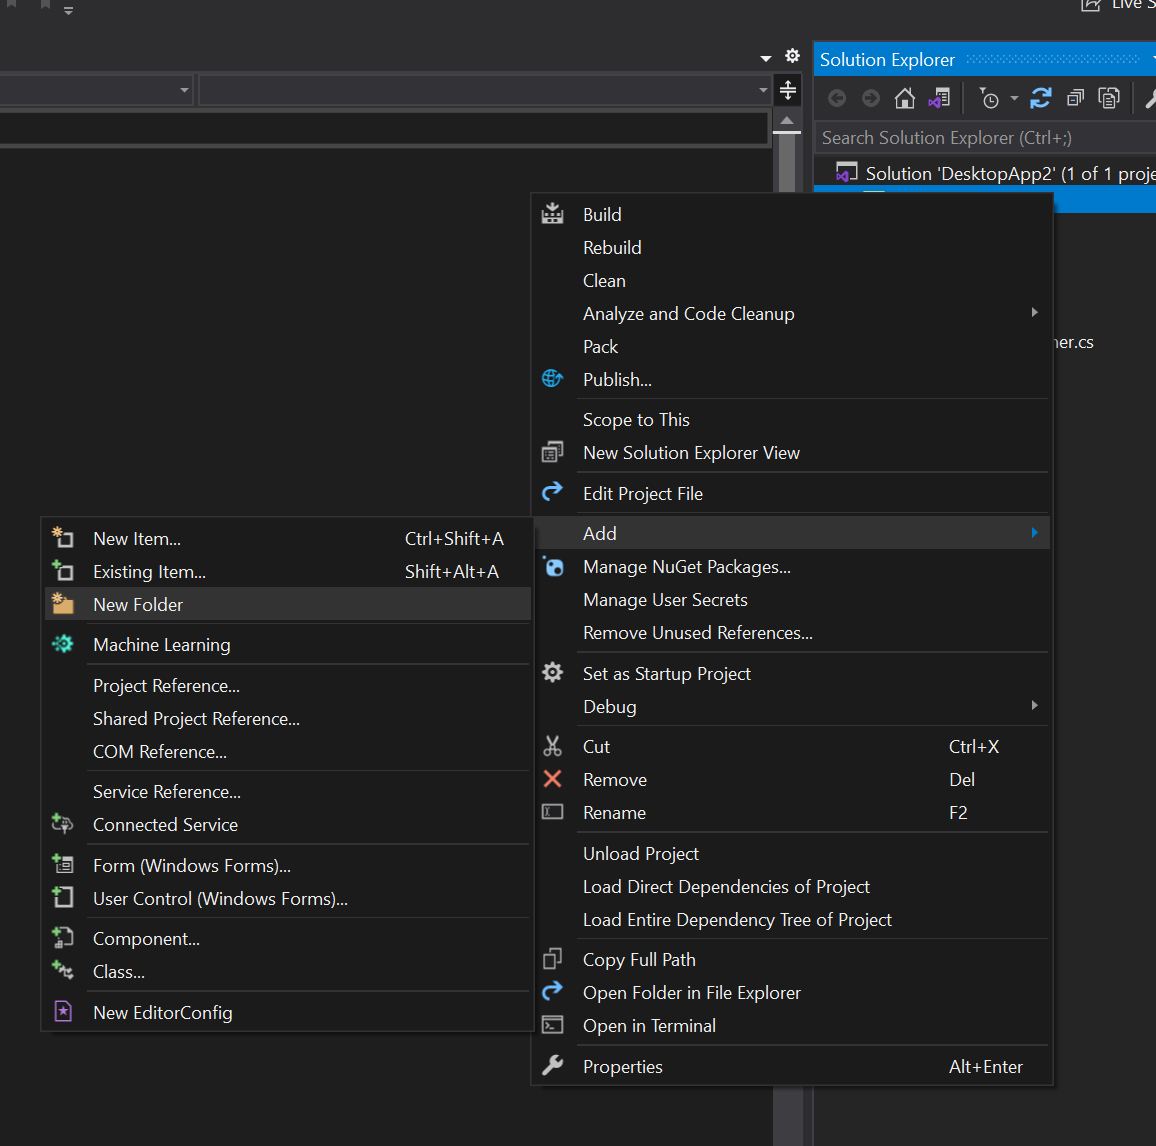
Name your folder Data. The casing of this word is important so name it exactly as seen in this guide. Within that folder add a new empty class as you did before, this time name it after your table. In this example my table is called Example and so this file will be called Example.cs. Inside this file paste the following code.
using System;
using System.Collections.Generic;
using System.ComponentModel.DataAnnotations;
using System.ComponentModel.DataAnnotations.Schema;
using System.Linq;
using System.Text;
using System.Threading.Tasks;
using Microsoft.Data.Sqlite;
using Microsoft.EntityFrameworkCore;

namespace DesktopApp2.Data
{

    [Table("Example")]
    public class Example
    {
        public int Id { get; set; }
        public String Firstname { get; set; }
    }
}
There are a couple of key things to recognise with this code. The first is the namespace which should match our Project Name, and also followed by the current directory after a period symbol (.). In this case that is DesktopApp2.Data.
The next thing is the table indicator which has our table name from our SQLite database, exactly as it appears in the database, in this case you can see this is Example, that’s because my database has a table called Example, bad naming I know!
Following this we have a public class, which contains the information of the table. You can see in this code sample that my table has a column called Id which has a datatype int short for integer. It also has a field/column called Firstname which will store the datatype String.
This should match your table layout exactly. The get and set methods simply mean that I can carry out both get and set methods on the table. Get means I can retrieve data and set means that I can modify, update and insert data into the table.
Connect the App
Now that we have our basis for the data connection in place we need to tell our application to recognise the Database Context that we have created. To do this add a new item to your project. You have completed this step a few times so far so this should now be a familiar instruction.
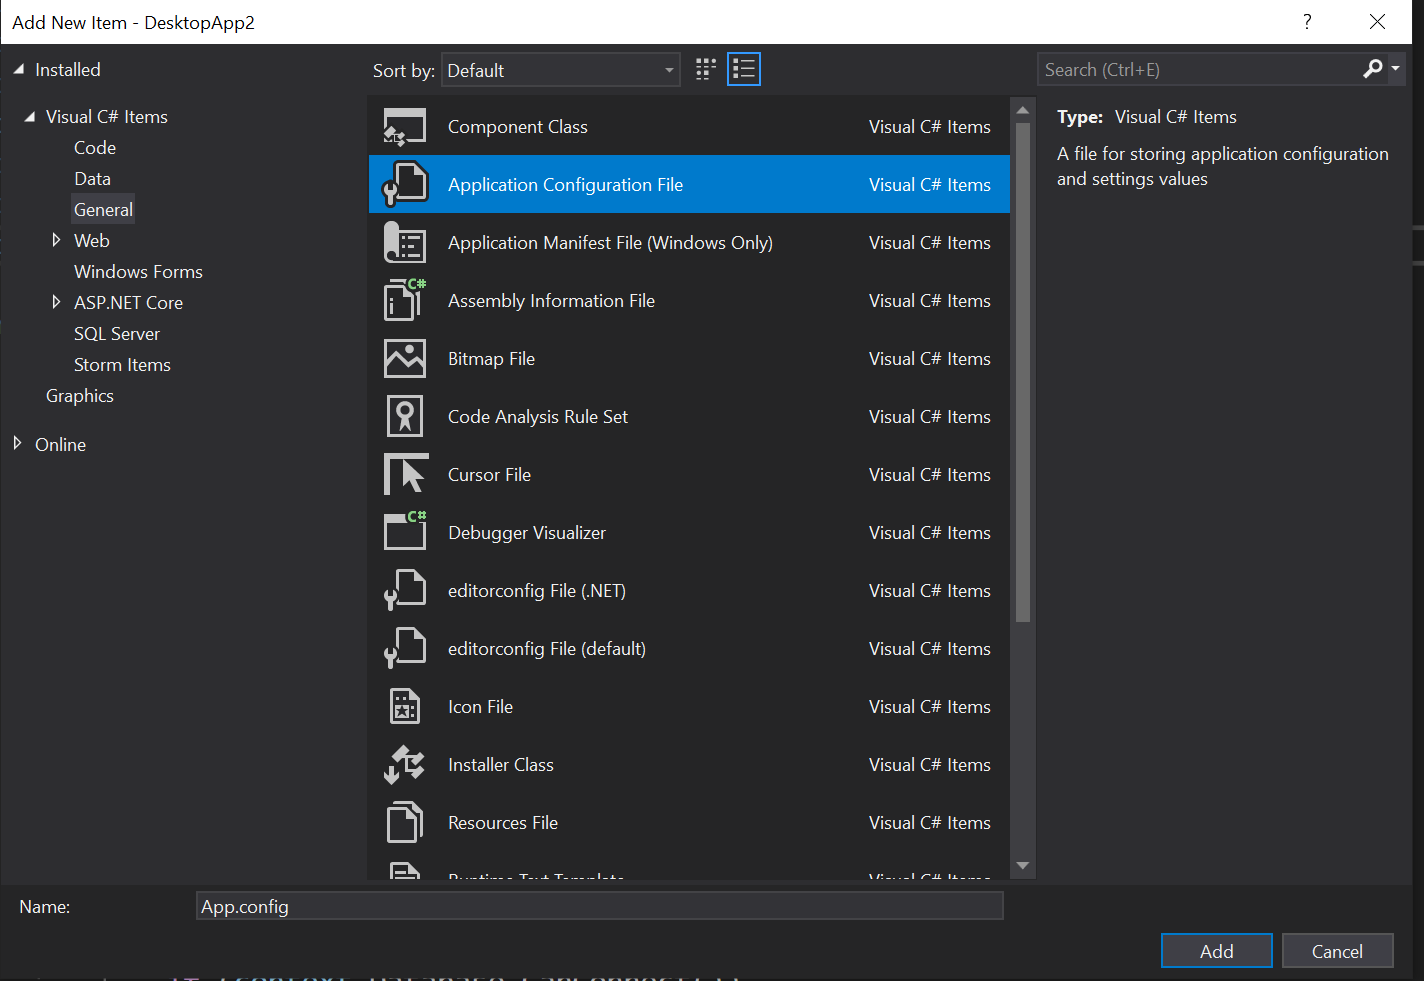
In this screen you should select General on the left hand tree menu, followed by Application Configuration File. This will generate an App.Config file in your solution explorer. This should open by default into a code view but if not double click the App.Config file in the solution explorer to open it.
Once within the file, replace the code with the following code snippet.
<?xml version="1.0" encoding="utf-8" ?>
<configuration>
  <connectionStrings>
    <add name="Default" connectionString="Data Source=.\database.db" providerName="System.Data.Sqlite"/>
  </connectionStrings>
</configuration>
Again a couple of key bits of information here, first the location of the database file you added to your project. As this should be in your project route you can just use the path .\database.db where database.db is the name of your database file.
Save this file and close the code editor for that file (not Visual Studio).
Data Retrieval
This part of the guide will go through actually collecting some data from your database, important thing here is to take into account this is just an example, one example at that. This will not work for every scenario and that’s your next job - to have a look at different ways to access the data you require for your assessment.
We will start in the Visual Designer for this part of the guidance.
Start by adding a listbox and button to your form, they look like below. Give them an appropriate name, remember our naming conventions for example a button should be called something along the lines of btnLoad where btn indicates clearly in our code that this is a button. A listbox could be called for example lstNames, where lst gives a clear indication that this is a listbox in our code.
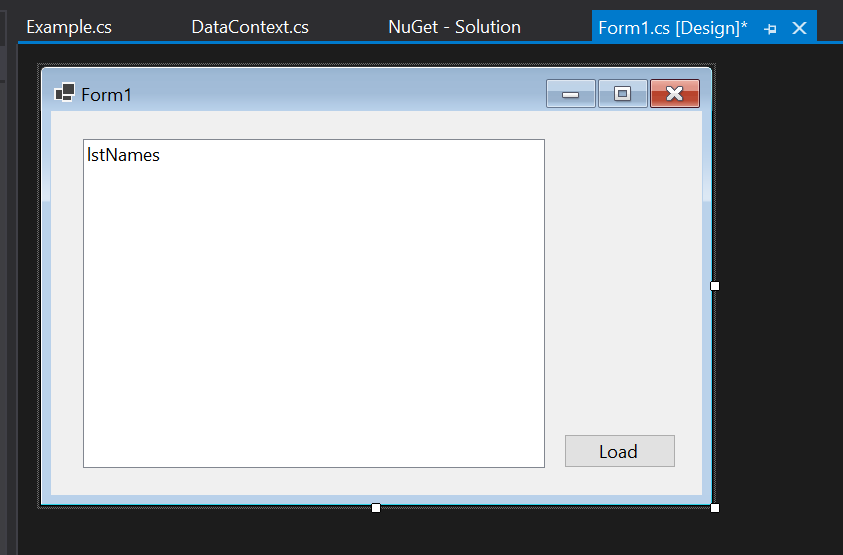
Once you’re happy you have your layout, keep track of your control names, in this case lstNames and btnLoad. Now double click the Load button (in my example, or whatever button you just added in your own). This will load the code view and will automatically generate some event driven code allow us to create some code to react to a click event on that button. You can see an example of this code block in the screenshot below.

Add the following code within the curly braces {}.
var context = new DataContext();
// if the connection to the database is successful
if (context.Database.CanConnect())
{
// clear the list
lstNames.Items.Clear();
// get the first 100 results
var result = context.Example.Take(100);
// loop the results from the database
foreach (var item in result)
{
// add the firstname to the listbox
lstNames.Items.Add(item.Firstname);
}
// alert the user that all is well
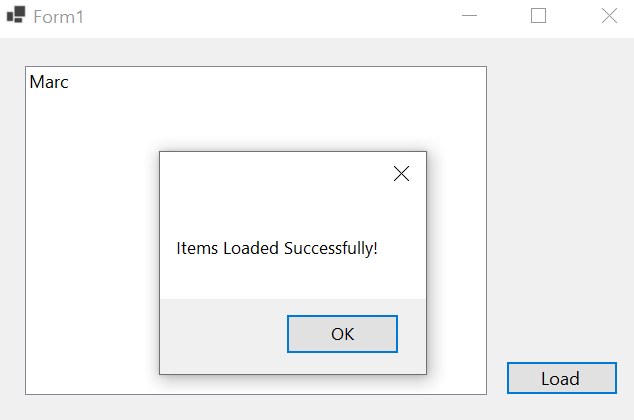
MessageBox.Show("Items Loaded Successfully!");
}
This code connects to your database using the DataContext that we created in this guide, using the following line of code. Think where you may be able to use this again in your application. There may also be a better way, or more efficient way to use this again and again.
var context = new DataContext();
The next line contains the start of a Conditional Statement in this case specifically an if statement. This checks to make sure we have a database connection before actually attempting to do anything with the data, obviously this won’t work if the database isn’t connected properly.
// if the connection to the database is successful
if (context.Database.CanConnect())
{

}
The next line clears the listbox incase there is any default data, this is just good practice.
 // clear the list
 lstNames.Items.Clear();
Followed by the code which actually selects the data from the database. This is what is called an Entity Framework query, remember we loaded that earlier when we were adding NuGet Packages. This allows us to essentially query the database without writing any SQL at all. In this case we’re saying take the first 100 results from the Example table.
It’s really important that Example exists as a Model within the application, and this is correct. Any mistakes in the model file will prevent this from working.
// get the first 100 results
var result = context.Example.Take(100);
In the code block above we’re storing the results in a variable called result. From this i’ve then created a For Loop which inserts a new listbox item for each result.
// loop the results from the database
foreach (var item in result)
{
    // add the firstname to the listbox
    lstNames.Items.Add(item.Firstname);
}
That’s it….Clicking the Play icon on the top toolbar to build and run the application will provide your output.
Remember this is a guide to get started, you need to take this and run. What else can you do with this application so far, start to think about building your database structure and planning what other queries might be required to work towards the outcomes for your assessment.
Happy Coding 😎.